
Showing posts with label freeze. Show all posts
Showing posts with label freeze. Show all posts
Thursday, April 26, 2012
How Long Will It Keep?
One great way to stretch your pennies and be frugal is to freeze stuff, and not toss leftovers before they have truly gone bad. Here's a good chart I found from Good Housekeeping called "How Long Will It Keep?" in the freezer. Everything from milk to bacon to cheesecake is on this list! I hope you can click on this picture and enlarge it - I really don't have the time to type up every single thing on this list, and I can't find this chart on the Good Housekeeping website for some reason.

Monday, August 1, 2011
Make Your Own (And How To Freeze)
WAFFLES!
I'm sure most of you do have a waffle recipe in one of your cookbooks but how often do you use it? I never pay for frozen waffles (although if they are free, yes, I rack up on them!) because they are so easy to make! I was talking to a girl at church the other day about how often her family eats out just for convenience. I was suggesting doing baking days. This is a great thing for when you have some free time (I know, I know, what's that) that you can make in bulk all at once and freeze. So, this is the type of thing I would assume most people know how to do, but a wise woman (my sister) once told me never to assume that people know everything I know.
So, I give you, homemade waffles and how to freeze them for future use. (I got the recipe I use from here)
Waffles Recipe
Ingredients:
1 3/4 cups all-purpose flour
2 tsp baking powder
1/2 tsp salt
1 Tbsp sugar
3 eggs
1 3/4 cups milk
1/2 cup vegetable oil
1/2 tsp pure vanilla extract (optional)

 Freezing them is a cinch! For example, this recipe makes eight waffles for my waffle iron. This morning when I made them, Brianna and I each had two, so we had four left over. I set them on a wire rack to cool. When they were cool, I simply put them in a freezer bag, put the date on them, and put them in the freezer! How easy is that!? They should last a good two months in the freezer.

Yes, you can do this with pancakes too. I have an awesome pancakes recipe... I'll need to find it and post it sometime. Oh, and go crazy adding stuff to your waffles - fruit (I have strawberries and blueberries galore in the freezer just begging to be added to my next batch!) or of course Stephen's choice - chocolate.
Make a large batch of these every couple of months and you'll never have to buy frozen waffles again!
Note: Okay, I just looked at the ingredients list on a box of frozen waffles in my freezer... over 30 INGREDIENTS! Are you kidding me!?!? That makes me cringe...
I'm sure most of you do have a waffle recipe in one of your cookbooks but how often do you use it? I never pay for frozen waffles (although if they are free, yes, I rack up on them!) because they are so easy to make! I was talking to a girl at church the other day about how often her family eats out just for convenience. I was suggesting doing baking days. This is a great thing for when you have some free time (I know, I know, what's that) that you can make in bulk all at once and freeze. So, this is the type of thing I would assume most people know how to do, but a wise woman (my sister) once told me never to assume that people know everything I know.
So, I give you, homemade waffles and how to freeze them for future use. (I got the recipe I use from here)
Waffles Recipe
Ingredients:
1 3/4 cups all-purpose flour
2 tsp baking powder
1/2 tsp salt
1 Tbsp sugar
3 eggs
1 3/4 cups milk
1/2 cup vegetable oil
1/2 tsp pure vanilla extract (optional)

Preheat your waffle iron to the hottest setting. Preheat the oven to 200 degrees if you are eating them right away (you can put them in there to keep them warm).
Sift together flour, baking powder and salt. Beat eggs thoroughly. Whisk in sugar, milk, and oil. Add liquid ingredients to dry ingredients and mix gently until combined. Don't overmix.
Spray your waffle iron with cooking spray. Ladle your batter on your waffle iron and close it. Cook until done - your waffle should be golden brown and crispy.
 Freezing them is a cinch! For example, this recipe makes eight waffles for my waffle iron. This morning when I made them, Brianna and I each had two, so we had four left over. I set them on a wire rack to cool. When they were cool, I simply put them in a freezer bag, put the date on them, and put them in the freezer! How easy is that!? They should last a good two months in the freezer.
Yes, you can do this with pancakes too. I have an awesome pancakes recipe... I'll need to find it and post it sometime. Oh, and go crazy adding stuff to your waffles - fruit (I have strawberries and blueberries galore in the freezer just begging to be added to my next batch!) or of course Stephen's choice - chocolate.
Make a large batch of these every couple of months and you'll never have to buy frozen waffles again!
Note: Okay, I just looked at the ingredients list on a box of frozen waffles in my freezer... over 30 INGREDIENTS! Are you kidding me!?!? That makes me cringe...
Tuesday, July 13, 2010
Frugal Tips: Freezing Eggplant
Today's freezer topic: Eggplant
Eggplant is not a food I would normally think of freezing, or even using, because we don't really eat it around here. Mainly because someone doesn't really like to try too many new foods at once. Not naming any names. Fortunately, I have parents who I eat with once a week, and they are willing to eat anything! I mean, really. So when I got eggplant in one of our boxes from the food co-op I was excited to finally make eggplant parmesan! The problem is I'm not making it right away, so I wanted to freeze my eggplant so I can use it next week. So if you have eggplant coming out your ears, here is the easy way to freeze it for later!
Items you will need:

Rinse the peeled eggplant and then slice it. Don't do it too thin - about 1/3-inch thick is good. It's a good idea to go on and put a large pot of water on to start boiling. Eggplant discolors very quickly when it hits the air, so you're going to want to prepare it quickly.

Add some lemon juice to the boiling water; this will help the discoloration of the eggplant. Once the water has reached a rolling boil, put the eggplant in to blanch. You will blanch the eggplant for 4 minutes, so after you put the eggplant in, cover the pot and start your timer.

When the four minutes is up, remove the eggplant with a slotted spoon and dump it in your bowl of ice water. Cool for about 5 minutes.

Drain thoroughly for about 3 minutes. Longer won't hurt, but don't forget it's still going to brown very quickly, so the longer you have it out the uglier it will get. Not that that affects the taste! Please note: if you are making Eggplant Parmesan, you can go on and dip the slices in batter, coat them with bread crumbs, and then continue to the next step.
 Almost done! Now you want to freeze your slices. You have several options here. If you battered and breaded and wax papered your slices, go on and put them in your freezer bag or ziploc bag. If you are just using a ziploc bag make sure you get as much air out as possible.
If you did not batter your slices yet, you can lay out your slices on plastic wrap between layers. I did this so my slices wouldn't stick together as they were freezing.
If your eggplant is really wet still, but you don't have time to sit around waiting for it to dry, put it in your freezer bag and freeze it unsealed and standing upright in your freezer. Several hours later when it's frozen you can seal it and it won't be as messy - the juice will be frozen.

In general, you can expect eggplant to be good for about 9 months in your freezer. Mine is only going to last until next week so I didn't even put a date on it. Even if you use your eggplant after the 9-month mark, it'll still be fine, just won't taste as fresh.
Now you can have eggplant all year long!
Eggplant is not a food I would normally think of freezing, or even using, because we don't really eat it around here. Mainly because someone doesn't really like to try too many new foods at once. Not naming any names. Fortunately, I have parents who I eat with once a week, and they are willing to eat anything! I mean, really. So when I got eggplant in one of our boxes from the food co-op I was excited to finally make eggplant parmesan! The problem is I'm not making it right away, so I wanted to freeze my eggplant so I can use it next week. So if you have eggplant coming out your ears, here is the easy way to freeze it for later!
Items you will need:
- Eggplant (any quantity)
- 1 large pot of boiling water (bring to a rolling boil)
- plenty of ice in a large bowl of cold water
- a vacuum food sealer or freezer bags
Step 1: Wash your eggplant really well. Yes, even though you are about to peel it. Cut the ends off and then peel the eggplant with a vegetable peeler.

Rinse the peeled eggplant and then slice it. Don't do it too thin - about 1/3-inch thick is good. It's a good idea to go on and put a large pot of water on to start boiling. Eggplant discolors very quickly when it hits the air, so you're going to want to prepare it quickly.

Add some lemon juice to the boiling water; this will help the discoloration of the eggplant. Once the water has reached a rolling boil, put the eggplant in to blanch. You will blanch the eggplant for 4 minutes, so after you put the eggplant in, cover the pot and start your timer.

When the four minutes is up, remove the eggplant with a slotted spoon and dump it in your bowl of ice water. Cool for about 5 minutes.

Drain thoroughly for about 3 minutes. Longer won't hurt, but don't forget it's still going to brown very quickly, so the longer you have it out the uglier it will get. Not that that affects the taste! Please note: if you are making Eggplant Parmesan, you can go on and dip the slices in batter, coat them with bread crumbs, and then continue to the next step.
 Almost done! Now you want to freeze your slices. You have several options here. If you battered and breaded and wax papered your slices, go on and put them in your freezer bag or ziploc bag. If you are just using a ziploc bag make sure you get as much air out as possible.
If you did not batter your slices yet, you can lay out your slices on plastic wrap between layers. I did this so my slices wouldn't stick together as they were freezing.
If your eggplant is really wet still, but you don't have time to sit around waiting for it to dry, put it in your freezer bag and freeze it unsealed and standing upright in your freezer. Several hours later when it's frozen you can seal it and it won't be as messy - the juice will be frozen.

In general, you can expect eggplant to be good for about 9 months in your freezer. Mine is only going to last until next week so I didn't even put a date on it. Even if you use your eggplant after the 9-month mark, it'll still be fine, just won't taste as fresh.
Now you can have eggplant all year long!
Saturday, July 10, 2010
Frugal Tips: Freezing Celery
Today's freezer topic: Celery
I had a reader (okay, it was my sister) ask me about freezing celery. I thought this was a great question because I rarely use the entire bunch of celery that you have to buy. I hate throwing out food but there are always one or two stalks that I just can't eat before they rot. So I was happy to have motivation to find out if you can, in fact, freeze celery. Good news - you can. Although it is recommended for using only in recipes (rather than munching with some peanut butter) that is pretty much how I use celery anyway, so it works for me!
Items you will need:


All done! Now the next time you are making minestrone soup or chicken and dumplings, just pull out that celery from your freezer!
I had a reader (okay, it was my sister) ask me about freezing celery. I thought this was a great question because I rarely use the entire bunch of celery that you have to buy. I hate throwing out food but there are always one or two stalks that I just can't eat before they rot. So I was happy to have motivation to find out if you can, in fact, freeze celery. Good news - you can. Although it is recommended for using only in recipes (rather than munching with some peanut butter) that is pretty much how I use celery anyway, so it works for me!
Items you will need:
- Celery (any quantity)
- 1 large pot of boiling water (bring to a rolling boil)
- plenty of ice in a large bowl of cold water
- a vacuum food sealer or freezer bags
First of all, wash those celery stalks really well. Go on and pull them apart and scrub each one individually. Trim off the ends and cut the stalks into 1-inch lengths or so.

Blanch the celery for 3 minutes. In other words, get a large pot filled with water and bring the water to a rolling boil. Dump the celery in there and time 3 minutes.

At 3 minutes, remove the celery, drain and quickly immerse in ice cold water. Leave it in there for about five minutes.

Drain the celery and package in a vacuum freezer bag, or a Ziploc bag, excluding as much air as possible. If you really do exclude as much air as possible it should last for up to a year in the freezer.

All done! Now the next time you are making minestrone soup or chicken and dumplings, just pull out that celery from your freezer!
Saturday, May 15, 2010
Frugal Tips: Freezing Onions
I always assumed that there are certain foods that everyone knows freeze well, and everyone knows how to freeze those foods. But we all know how assuming can turn out. Since I was chopping up my onions for the freezer anyway, I decided to let you know my way of freezing. It's not exactly the way the Food Network would probably tell you to do it, but it's always worked for me.
Step 1: Get onions. Chop off the ends, peel off the top layer, and wash thoroughly. Give them a good cleaning!
Step 2: Chop onions.
Step 3: Put chopped onions in ziploc bags and put them in the freezer.
Voila!
Okay, so a little bit more detail here. I like to plan ahead when I am chopping my onions. For example, I love onion rings! So, I plan in advance that I will probably want onion rings:
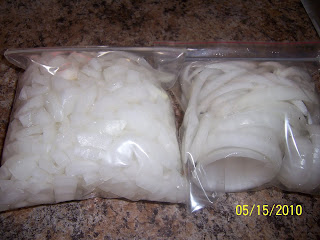
 I also love caramelized onions on my hamburgers, and there is a spinach salad recipe I've been wanting to try that uses caramelized onions. I like mine done in strips, so again, I plan ahead:
 But truthfully, the majority of my onions are simply chopped/diced/whatever you want to call it. Besides, you can always chop your strips or your rings, but you can't put your chops back together to make a strip! That is a very strange sentence but I think you get my point.
 Then all I do is throw them into freezer bags (I don't always even use freezer bags, just plain old ziploc bags) and pull them out as I need them.
You'll notice I don't label mine with the date. That's because it's never very long before I use them, so I don't have to worry about them being in the freezer for a year before I get to them.
I think that technically you are supposed to freeze onions like I would, say, strawberries or mushrooms. In other words, once they are sliced and diced, you lay them on a cookie sheet and freeze them separately for a couple of hours. After they are frozen solid, you then dump them into a baggie or other container. I have always skipped this step and mine have always turned out just peachy. Freezing them separately adds an extra step but it's such a small extra step you may want to do it.
So don't ever throw away a bad onion again! Buy in bulk proudly, and freeze those onions!
Step 1: Get onions. Chop off the ends, peel off the top layer, and wash thoroughly. Give them a good cleaning!
Step 2: Chop onions.
Step 3: Put chopped onions in ziploc bags and put them in the freezer.
Voila!
Okay, so a little bit more detail here. I like to plan ahead when I am chopping my onions. For example, I love onion rings! So, I plan in advance that I will probably want onion rings:
 I also love caramelized onions on my hamburgers, and there is a spinach salad recipe I've been wanting to try that uses caramelized onions. I like mine done in strips, so again, I plan ahead:
 But truthfully, the majority of my onions are simply chopped/diced/whatever you want to call it. Besides, you can always chop your strips or your rings, but you can't put your chops back together to make a strip! That is a very strange sentence but I think you get my point.
 Then all I do is throw them into freezer bags (I don't always even use freezer bags, just plain old ziploc bags) and pull them out as I need them.
You'll notice I don't label mine with the date. That's because it's never very long before I use them, so I don't have to worry about them being in the freezer for a year before I get to them.
I think that technically you are supposed to freeze onions like I would, say, strawberries or mushrooms. In other words, once they are sliced and diced, you lay them on a cookie sheet and freeze them separately for a couple of hours. After they are frozen solid, you then dump them into a baggie or other container. I have always skipped this step and mine have always turned out just peachy. Freezing them separately adds an extra step but it's such a small extra step you may want to do it.
So don't ever throw away a bad onion again! Buy in bulk proudly, and freeze those onions!
Friday, May 14, 2010
Frugal Tips: Freezing Corn
My last post on freezing was for bacon. Today's topic: Corn on the Cob
I had the revelation for this because Lowes Food has corn on the cob on sale right now - 8 cobs for $2.00. That means $0.25 per cob! That is a great price. Corn on the cob is not really expensive anyway, but if you can find it for that price you might as well buy it and save it for the rest of the summer. I bought 4 cobs of white corn and 4 of yellow corn. We will use a couple this weekend when we grill out, but the rest I wanted to freeze so we can pop them out at any opportunity and have them with dinner. Yum! Freezing corn on the cob is really easy, just make sure you have the time for it. It doesn't take much more time than baking a cake or cooking dinner, though.
Items you will need:
Husk the corn and pick off as much silk as possible. I like using a vegetable brush but you obviously don't have to do that.

Get the largest pot you have, fill it 3/4 of the way with water, put it on your largest burner, and bring it to a rolling boil. Next, get a large bowl filled with LOTS of ice and cold water. I was doing four cobs and you can see the size of the pots I used:
 If you were going to do a dozen cobs or more you may need to actually buy a bag of ice and use a canner or stockpot.
So what you're going to do now is blanch the corn. You want to do this so that when you eat the corn later the corn still has the same color, flavor, and texture as if you were eating it fresh. Begin counting the blanching time as soon as you put the corn in the boiling water. Cover the pot and boil at high temperature for the required length of time. You can use the same water a few times in a row if you need to. Just be sure to keep adding water if the level decreases too much.
Blanching times for corn on the cob:
 After the corn is blanched, you have to cool it quickly to prevent overcooking. Put the corn into the ice-cold water. Cool for the same amount of time you blanched. (If you had it in the boiling water for 9 minutes, leave it in the ice water for 9 minutes). Drain thoroughly.
 If I could afford a real vacuum sealer I would buy one, especially since I hope to be freezing a lot of things this summer. If you're lucky enough to have one, use it! If you don't have one, you can get pretty much the same outcome by wrapping each dry corn cob in saran wrap, and then put it in the freezer bag. The corn should be good for about a year.

All done! Now you want to eat them? Just heat them up! Use a microwave for 3-4 minutes, boil them for 5-6 minutes, or thaw them and grill them as usual.
Now go get some corn! I feel like getting the grill heated up already....
I had the revelation for this because Lowes Food has corn on the cob on sale right now - 8 cobs for $2.00. That means $0.25 per cob! That is a great price. Corn on the cob is not really expensive anyway, but if you can find it for that price you might as well buy it and save it for the rest of the summer. I bought 4 cobs of white corn and 4 of yellow corn. We will use a couple this weekend when we grill out, but the rest I wanted to freeze so we can pop them out at any opportunity and have them with dinner. Yum! Freezing corn on the cob is really easy, just make sure you have the time for it. It doesn't take much more time than baking a cake or cooking dinner, though.
Items you will need:
- Corn (any quantity)
- 1 large pot of boiling water (bring to a rolling boil)
- plenty of ice, in a large bowl of water
- a vacuum food sealer OR freezer bags
Husk the corn and pick off as much silk as possible. I like using a vegetable brush but you obviously don't have to do that.

Get the largest pot you have, fill it 3/4 of the way with water, put it on your largest burner, and bring it to a rolling boil. Next, get a large bowl filled with LOTS of ice and cold water. I was doing four cobs and you can see the size of the pots I used:
 If you were going to do a dozen cobs or more you may need to actually buy a bag of ice and use a canner or stockpot.
So what you're going to do now is blanch the corn. You want to do this so that when you eat the corn later the corn still has the same color, flavor, and texture as if you were eating it fresh. Begin counting the blanching time as soon as you put the corn in the boiling water. Cover the pot and boil at high temperature for the required length of time. You can use the same water a few times in a row if you need to. Just be sure to keep adding water if the level decreases too much.
Blanching times for corn on the cob:
- Cobs smaller than 1 1/4 inches in diameter - 7 minutes
- Cobs 1 1/4 to 1 1/2 inches in diameter - 9 minutes
- Cobs over 1 1/2 inches in diameter - 11 minutes
 After the corn is blanched, you have to cool it quickly to prevent overcooking. Put the corn into the ice-cold water. Cool for the same amount of time you blanched. (If you had it in the boiling water for 9 minutes, leave it in the ice water for 9 minutes). Drain thoroughly.
 If I could afford a real vacuum sealer I would buy one, especially since I hope to be freezing a lot of things this summer. If you're lucky enough to have one, use it! If you don't have one, you can get pretty much the same outcome by wrapping each dry corn cob in saran wrap, and then put it in the freezer bag. The corn should be good for about a year.
All done! Now you want to eat them? Just heat them up! Use a microwave for 3-4 minutes, boil them for 5-6 minutes, or thaw them and grill them as usual.
Now go get some corn! I feel like getting the grill heated up already....
Saturday, May 1, 2010
Frugal Tips: Freezing Bacon
One great way to save money is to stockpile items. I know that's pretty obvious with pantry and paper products, but there are so many foods that are freeze-able (is that a word??). If you find something at a steal you should always see if you can freeze it so you can stock up on it for the future, particularly if you have a chest freezer. We didn't always have one and since we've gotten one I have taken to freezing EVERYTHING!
Today's topic: Bacon
Is anyone else getting tons of bacon from Harris Teeter triples this week? I am turkey bacon crazy! I love having bacon at my fingertips for breakfast, soups, hamburgers, and sandwiches whenever I feel like it. Bacon is something I normally wouldn't buy because of the expense. So at $0.25 a pop this week, I am stocking up.
The problem is, Stephen doesn't eat turkey bacon. It doesn't have as much fat and gets crunchy too easily, allegedly. So I'm stocking up on bacon for just me. Thank goodness for the freezer! Freezing bacon is so easy, and so is preparing it after taking it out of the freezer!
Items you will need:

Lay a long strip of wax paper out. You will need quite a bit for an entire package of bacon, but if you run a little short you can always do two separate wraps. On the strip of paper, lay out each bacon strip, about 1/2 an inch apart.
 Tear off another piece of wax paper the same length as the first piece. Lay it over the bacon. Begin rolling, one piece at a time, until all pieces are in a roll. Put the roll of bacon in a freezer bag and label what it is with the date.

To use the bacon, remove it from the freezer, and then just unroll as much as you need. Fold the wax paper back, and you can remove just as many slices as you need.
So go ahead, buy twenty packages of bacon! It will keep for many, many months in the future!! I smell bacon, egg and cheese biscuits....
Today's topic: Bacon
Is anyone else getting tons of bacon from Harris Teeter triples this week? I am turkey bacon crazy! I love having bacon at my fingertips for breakfast, soups, hamburgers, and sandwiches whenever I feel like it. Bacon is something I normally wouldn't buy because of the expense. So at $0.25 a pop this week, I am stocking up.
The problem is, Stephen doesn't eat turkey bacon. It doesn't have as much fat and gets crunchy too easily, allegedly. So I'm stocking up on bacon for just me. Thank goodness for the freezer! Freezing bacon is so easy, and so is preparing it after taking it out of the freezer!
Items you will need:
- Bacon
- Wax paper or parchment paper

Lay a long strip of wax paper out. You will need quite a bit for an entire package of bacon, but if you run a little short you can always do two separate wraps. On the strip of paper, lay out each bacon strip, about 1/2 an inch apart.
 Tear off another piece of wax paper the same length as the first piece. Lay it over the bacon. Begin rolling, one piece at a time, until all pieces are in a roll. Put the roll of bacon in a freezer bag and label what it is with the date.
To use the bacon, remove it from the freezer, and then just unroll as much as you need. Fold the wax paper back, and you can remove just as many slices as you need.
So go ahead, buy twenty packages of bacon! It will keep for many, many months in the future!! I smell bacon, egg and cheese biscuits....
Subscribe to:
Posts (Atom)

